Categories
Home Maintenance

Walk and Caulk Your Home’s Exterior

Caulking was not created for bathrooms alone. If you’re interested in weatherizing your home and need to keep the cost of doing so to a minimum, buy some fresh caulk and get the cobwebs off your caulk gun. There are spaces and gaps all over the exterior of your home that are just waiting to be filled – and you might just be surprised at how many you find – according to Andy, Chicago Exterior Painting Contractor. Grab your caulk gun and take a walk outside.

First, take a look at all your utility lines. Electric, telephone, cable and satellite all require utility lines to tunnel into your home. Holes are drilled into your home that let your utility lines in along with unwanted cold air. But that’s not all. The passageway for gas pipes, water pipes and sewer pipes are harbors for subways of air loss to run through. Remember that there will be more than one entranceway for many of these utility lines and pipes. Find the exterior entranceway for all of your utility piping and wiring, and caulk the gaps closed.

That’s just the beginning. Now you’re going to look for exterior electrical fixtures to seal. Exterior light fixtures usually need some caulk around the base. Exterior electric receptacles need caulk around the box, even though they have a gasket between the cover plate and the electrical box. Dryer vents, fans and roof vents can always use some caulk around the edges to seal things up, and you’ll probably need some caulk to tighten up the seal on your air-conditioner.

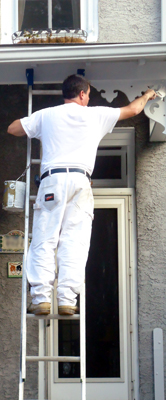
Modern electricity isn’t the largest culprit to induce air loss. Take a look at your windows, then grab a ladder. Old peeling caulk needs to be removed and replaced. You can cut the old caulk with a utility knife to get a good start on a strip. Pull the old caulk off gently and dust off the area. Prime the area with an exterior primer, and make sure you prime the nearby exposed wood. Once the primer dries, you can re-caulk the area. After you have re-caulked the window area and the caulk has dried, you can brush on a coat or two of paint. Once you’ve caulked the window edges and frames, do the same for door frames.

If you have any extensions on your house, such as a deck, front porch, or an added on room, take a look at where the joint meets the main house – you might be able to squeeze some caulk in there. While you’re at it, look where the house siding meets the foundation and see if there isn’t room for caulking improvement. When you get off the ground, look around at all of your siding. Wherever a joint meets a stone or brick wall, at corners, or where two different sizes of siding meets – check to see if there’s room to caulk. You might as well caulk up any nails and scratches in the siding since you’re in the area.

Once you take a look around you might feel your house is no more than a window screen holding the heat in, and the job may seem overwhelming. Rest assured that if you fill your exterior gaps with caulk, you’ll fill your pockets with energy savings. Just use your anger at the cost of your heating and cooling bills to motivate you to get the job done – you can’t do any harm with a caulking gun.

Atomic Painting, Inc. – Chicago Exterior Painters.

Categories
Gutter Maintenance

Exterior Gutter Maintenance for Year Round Protection from Water Woes

After gutters guard your home from moisture mayhem for many seasons, they begin to look a little war-torn. And when your gutters start looking war-torn, your house will look worse. Sagging, rusty-looking gutter pipes overstuffed with leaves that drip with staining dirty water do nothing to add to the aesthetics of your home. If you’re not one to worry about what the neighbors think, keep in mind that if you don’t maintain your gutters, the condition of your house will start deteriorating from the outside in. Moisture problems will start seeping in, bringing in contagious mildew and rot with it.

Maintaining your gutters should be a part of your yearly maintenance plans. If you’ve ignored your sagging gutters for a few seasons, it’s time to get up on your ladder and bring your gutters back to life.

The first thing you need to do is clean your gutters. Use your hands and a putty knife to wipe out all the leaves and twigs that have accumulated over the years, and rinse the pipes and downspouts out with a garden hose. Once it’s cleaned out, you can take a look at the damage.

Take a look inside the trough at the joints between connecting pieces. You don’t want water dripping through these joints instead of being fully focused on the diverting downspout. Fill the seams with a caulking compound – you’ll find some labeled as “gutter seal” at the hardware store. After you clean and dry the seam area, squeeze on some caulk and smooth it in. There are also aerosol sealers on the market that can make the job easier.

If you have rusty galvanized metal gutters, you can fix up the rust holes with a few layers of foil paper and roofing cement. Scrub the area clean with a wire brush, then liberally brush on some roofing cement. Then press on some heavy-duty foil paper. Apply a second layer of roofing cement over that piece of foil paper, press on another sheet of foil paper, then add the last and final layer of roofing cement over the second piece of foil paper. Smooth out the final layer with a putty knife. If you have wood gutters, you should be treating your wood with a preservative every five years.

If it’s been a particularly windy fall or heavy winter, you might have ended up with sagging gutters. Basically, you just need to push them up and snap them into place. Remove the hangers or spikes that are keeping your gutters up. Snap the gutter back up to its original height, then refasten the hanger or spikes to keep the gutter pipe in its proper position. If your gutters are supported with hanging brackets, you might just need to loosen the bracket, reposition the gutter pipe, and tighten the bracket back up. Inspect your gutter line for broken hangers, brackets or spikes and replace any that look like they’ve had a rough season of holding things up.

If you don’t have a screen or leaf guard on your gutter covering the water trough, now is the time to put one on. You can fasten on a homemade screen, or buy easy-to-install mesh guards or aluminum leaf guards. The aluminum leaf guards are more costly, but they are angled so leaves fall to the ground instead of collecting on the wire mesh.

Plan on a dry day or two after the autumn season to get your gutter work done. Keeping your gutters from entering a war-torn state will keep your house from being a constant battle to repair. Gutter maintenance is time consuming, but by investing only a couple days a year, your gutters will work year-round to guard your home from water woes and moisture mayhem.