Chicago summers are short—but they’re the perfect window for home improvement. With dry weather, long daylight hours, and fewer weather-related delays, summer is the ideal time to upgrade one of your home’s most important features: the siding.
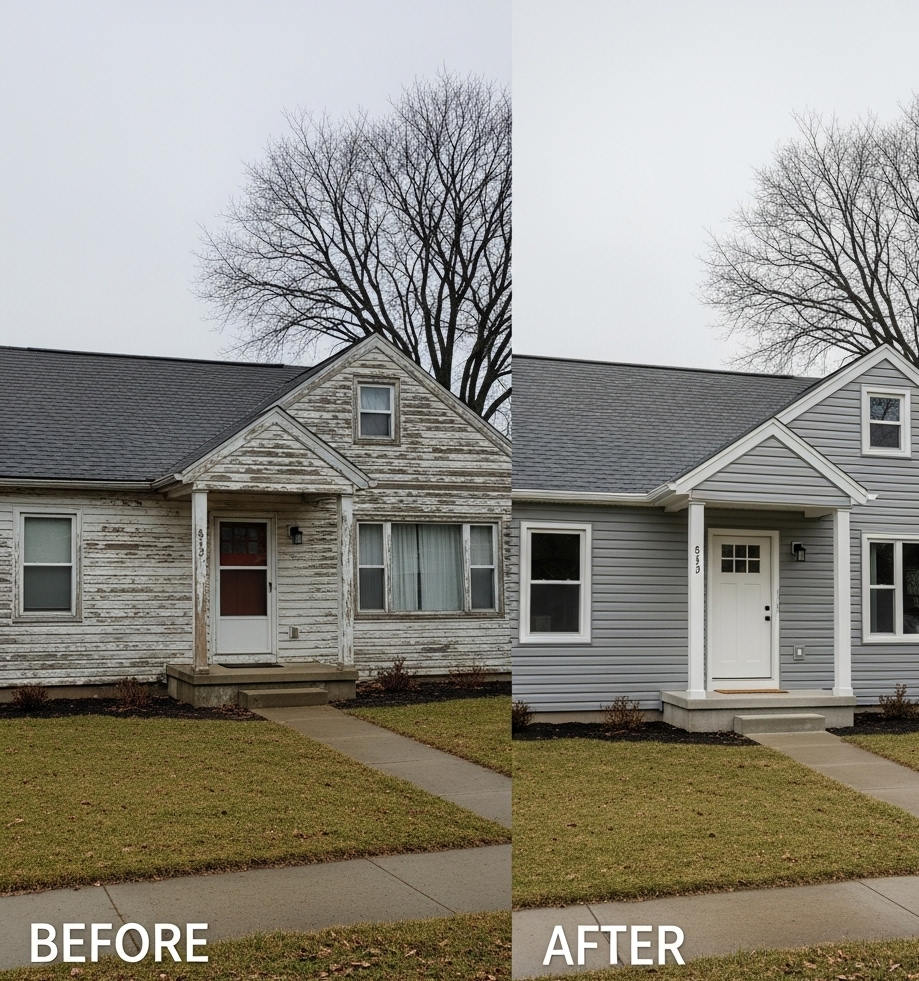
Siding is more than just a visual upgrade. It protects your home from Chicago’s harsh winters, insulates against extreme temperatures, and shields your interior from moisture damage. After enduring snow, wind, and spring rain, your home’s exterior may be showing signs of wear—cracks, warping, discoloration, or even mold. Summer offers the perfect conditions for assessing the damage and replacing or repairing your siding before the next cold season sets in.
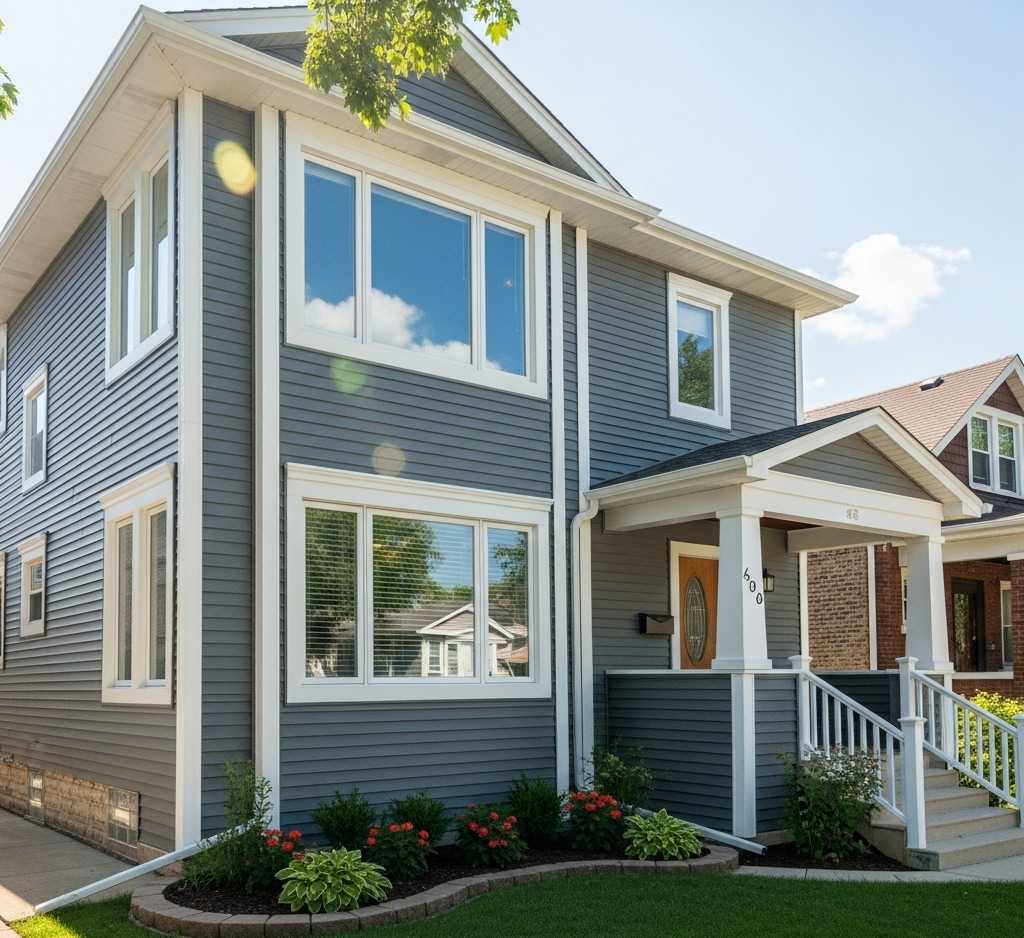
If your home hasn’t had a siding upgrade in 15–20 years, it might be time to invest in modern, durable materials. Today’s siding options are more energy-efficient, low-maintenance, and attractive than ever before. Vinyl siding, fiber cement, and engineered wood are all popular choices that offer long-term performance while enhancing the appearance of any Chicago home—whether it’s a historic bungalow or a modern two-flat.
In addition to protecting your home, new siding can dramatically boost curb appeal and property value—a smart move if you’re planning to sell in the near future. Even if you’re staying put, new siding gives your home a fresh, polished look that makes coming home feel even better.
Summer installations also tend to go faster. Roofing and siding contractors in Chicago, IL often prefer summer projects because dry weather allows for cleaner finishes and better adhesion, especially when painting or sealing is involved. It’s the most efficient time to get the job done right.
So if you’ve been putting off that siding project, don’t wait for another season to pass. Take advantage of Chicago’s summer weather and invest in siding that protects, insulates, and transforms your home for years to come.
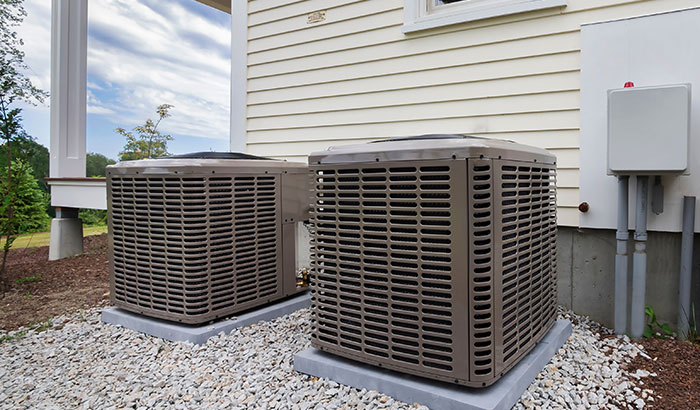
Discover how investing in a high-performance HVAC system can maximize the benefits of your quality siding, boosting your home’s energy efficiency, indoor comfort, and overall value. By understanding the synergy between these two critical components, you can ensure your home is both comfortable and efficient.
The Symbiotic Relationship Between HVAC Systems and Siding
Enhanced Energy Efficiency: A modern, efficient HVAC system works seamlessly with quality siding to maintain consistent indoor temperatures. This combination reduces the strain on your HVAC system, leading to lower energy bills. While high-quality siding provides excellent insulation, the efficiency gains can be compromised if paired with an outdated HVAC system. Upgrading your HVAC system ensures that your home fully capitalizes on the insulating properties of your siding, resulting in optimal energy efficiency.
Improved Indoor Air Quality: Modern HVAC systems come equipped with advanced filtration options that, when paired with well-sealed siding, help keep outdoor pollutants at bay. This synergy is essential for maintaining a healthier indoor environment. Additionally, while properly installed siding prevents moisture ingress, managing indoor humidity levels requires an efficient HVAC system. Together, they prevent mold and mildew growth, enhancing the overall indoor air quality.
Consistent Comfort and Climate Control: Insulated siding helps in maintaining indoor temperatures, but a high-efficiency HVAC system ensures these temperatures are evenly distributed throughout the home. This eliminates hot or cold spots, providing a consistently comfortable indoor environment. Moreover, many modern HVAC systems come with smart technology that allows for precise control of your home’s climate, complementing the thermal performance of quality siding.
Extending the Lifespan and Performance of Both Systems
Reducing System Load: Energy-efficient siding reduces the workload on your HVAC system, allowing it to operate more efficiently and last longer. This synergy means fewer repairs and replacements, ultimately saving you money in the long run. By reducing the strain on your HVAC system, you enhance its longevity and reliability, ensuring it performs optimally throughout its lifespan.
Long-Term Investment: Upgrading both your siding and HVAC system not only improves comfort and efficiency but also boosts your home’s market value. Prospective buyers appreciate the combination of high-quality siding and a modern HVAC system, as it signifies a well-maintained and energy-efficient home. This integrated approach to home improvement enhances both immediate comfort and long-term property value.
Tips for Homeowners
Regular Maintenance: To ensure both your siding and HVAC system continue to perform optimally, regular maintenance is essential. This includes checking for any damage, cleaning filters, and ensuring that seals remain intact. Engaging professionals for routine inspections and maintenance can help preemptively address issues, ensuring that both systems work harmoniously.
Upgrade Strategically: When planning home improvements, consider upgrading your HVAC system alongside your siding. This integrated approach maximizes the efficiency and comfort benefits of both investments. Conducting an energy audit can also identify areas where improvements can be made, helping you prioritize upgrades for the greatest impact on efficiency and comfort.
Investing in a high-performance HVAC system complements the benefits of quality siding, enhancing your home’s energy efficiency, indoor air quality, and overall comfort. For more information on how to upgrade your HVAC system to maximize the benefits of your siding, visit our recommended HVAC specialists.
Check out our trusted HVAC partners at hvaccontractorsinfo.com to explore the latest in energy-efficient heating and cooling solutions, designed to work perfectly with your high-quality siding.
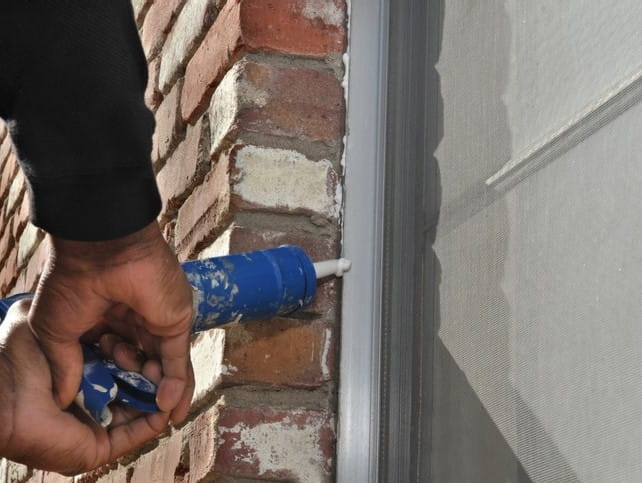
Caulking is a simple yet effective way to seal gaps and prevent damage in your home, from water leaks to air drafts. It’s a skill that every homeowner should have, as it not only protects but also improves the appearance of your spaces. This guide will walk you through the best practices for caulking, ensuring that you can handle this task like a pro.
Choose the Right Caulk
Type: The choice of caulk largely depends on the project: – Silicone caulk is waterproof and flexible, perfect for areas exposed to moisture like showers and sinks. It is mold and mildew resistant but cannot be painted. – Latex caulk is easier to work with and clean up and can be painted, making it ideal for interior projects such as sealing around doors and windows. – Polyurethane caulk is extremely durable and suitable for both indoor and outdoor projects, particularly where joints move significantly. Color: Caulk typically comes in clear, white, or a variety of colors. Clear caulk is useful when you don’t want to impact the surrounding aesthetic, while colored options should match the surrounding materials unless you plan to paint over it.
Prep the Surface
Thorough preparation is key to ensuring that the caulk adheres properly and lasts. Start by removing any old caulk with a caulk remover tool or a utility knife. Clean the area with soap and water or a solvent like isopropyl alcohol, and allow it to dry completely. This prevents dirt and moisture from undermining the new caulk’s effectiveness.
Use a Caulk Gun
A good caulk gun can make the application process smoother and more controlled. Features to look for include a pressure release mechanism to stop the flow of caulk when you release the trigger and a comfortable grip. Load the tube correctly and practice on a piece of cardboard if you’re unfamiliar with the tool.
Cut the Tip Correctly
The size of the hole in the caulk tube’s nozzle will determine the flow of the caulk. Cut it at a 45-degree angle for easier application along joints. Start with a smaller cut—you can always enlarge it if needed. This gives you more control over the amount of caulk dispensed.
Apply Evenly
Consistency is crucial for a professional-looking finish. Apply steady pressure on the trigger and move the gun along the seam in one fluid motion. Aim to keep the gun moving at a consistent speed and angle to lay down an even bead.
Smooth the Bead
Smoothing out the caulk bead is essential for both appearance and seal quality. You can use a damp finger, a caulk smoother, or a small spoon dipped in soapy water to gently press and smooth the caulk into the gap. This action helps it bond uniformly with both sides of the gap.
Let It Cure
Patience is important. Caulk needs time to set and achieve its full sealing properties. Avoid exposure to water and touching the caulk during this time. Check the product instructions for specific curing times, which can vary based on the type of caulk and environmental conditions.
Regular Maintenance
Even the best-applied caulk can degrade over time. Inspect caulked areas annually and look for signs of cracking or peeling. Address these issues promptly to maintain the integrity of your seals.
Caulking is a critical maintenance task that can prevent a variety of household problems. By following these detailed steps, you can ensure a watertight and airtight seal, keeping your home safe and well-maintained. Happy caulking!